
We had our big fat Indian wedding in July 2019, which took up the first half of the year in planning(that is a whole story for another time). So when we got back to California, all of a sudden, we had time on hand to just take a breath and find a new hobby.
We decided to start off small since we lived in an apartment and wanted to minimize clutter, Marie Kondo style. Our living room walls were begging for color so we decided to make a plant hanger to bring life and light to the space.
Reasons we chose this project
- Seemed easy enough as a starter project for people with limited experience in working with tools
- Fell within our budget (or so we thought!)
- Fit our space well- the living room had warm white light and a brown couch with beige and orange accent pillows
Inspiration and Design

I drew a lot of inspiration from Pinterest (check out my board).
We initially thought of doing a plant wall vertically all along a narrow column in the room, but then decided to start small and simple. Personally, I like plant hangers that have narrow gaps between the wooden planks; if the planks are abutted, it gets a bulky look, and if the gap is large (~ more than 1/4th the width of the narrowest plank), it starts to look disintegrated.
Prep
- Measure your overall dimensions to calculate the material you require (ours is 24″ x 24″ with 5 wooden planks and 6 planters/mason jars).
- Identify studs in the column/wall and measure around it to make the hanger look centered.
Tools and Material
- Drill set
- Screws (1″ starhead)
- Picture hangers
- Coir rope
- Hose clamps
- Eye hooks
- Wood boards (we used 0.75″x1.5″ poplar for the horizontal and 0.25″x3.5″ walnut for the vertical)
- Hand saw (optional)
- Serial lights
- Mason jars
- Indoor plants (like Pothos, spider plant, air plants, succulents, lucky bamboo etc.)
- Potting soil and rocks
Building it
I hadn’t planned on documenting this project when we were building it, so I don’t have pictures of the process but I will try to be as precise as I can.
1.Cut the wood to your designed dimensions, you can do this at the lumber store or using a handsaw if you have one.
2.Position the back braces and place the front boards on top of them as you find appealing. Screw on the front boards to the back brace.

3.To hang, drill a pilot hole in the back brace and screw in the eye hooks. Then run the coir rope through it.
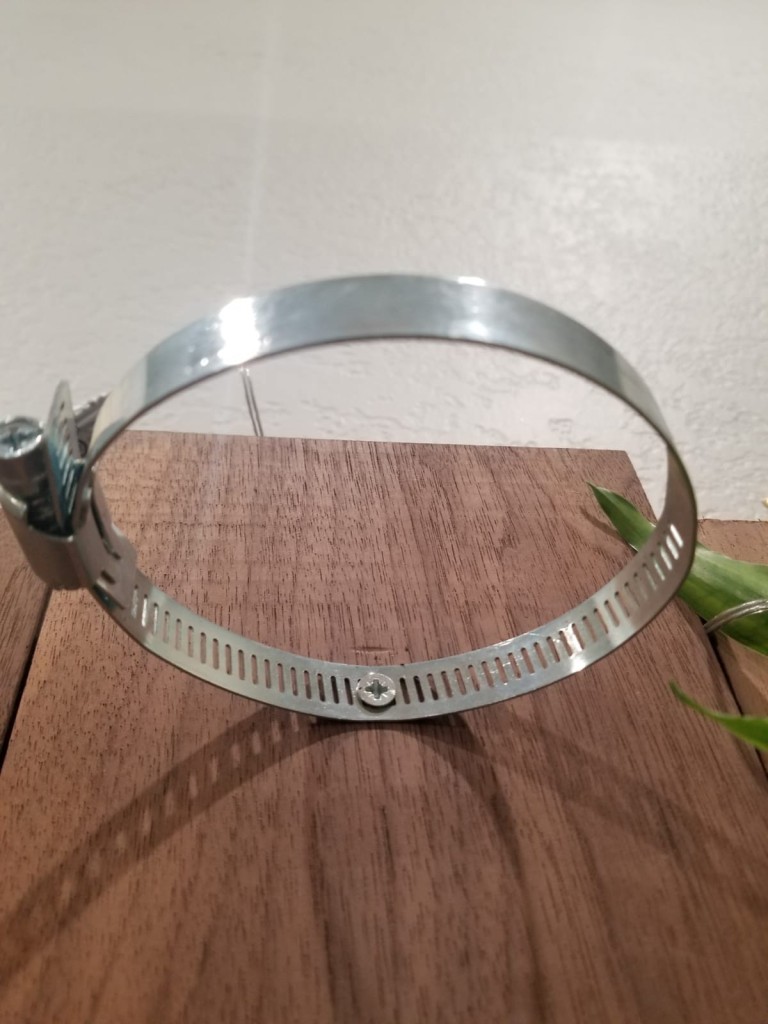
4.To attach the jars, mark their positions on the front. Open up the clamps and place them on the wood such that when wrapped around a jar, you can access the screw from the front.
5.Drive a screw through the clamp into the back brace (refer picture below). This is important because the front 0.25″ boards cannot bear the weight of the jars once they are filled in.
6.Prepare the mason jars with plants. I started with a layer of rocks at the bottom to allow for drainage and added soil on top in which I placed the plants.
7.Place the mason jars into the clamps and tighten to lock in place. Drape the lights around the plants.
8. Attach picture hangers into studs and suspend the plant hanger.
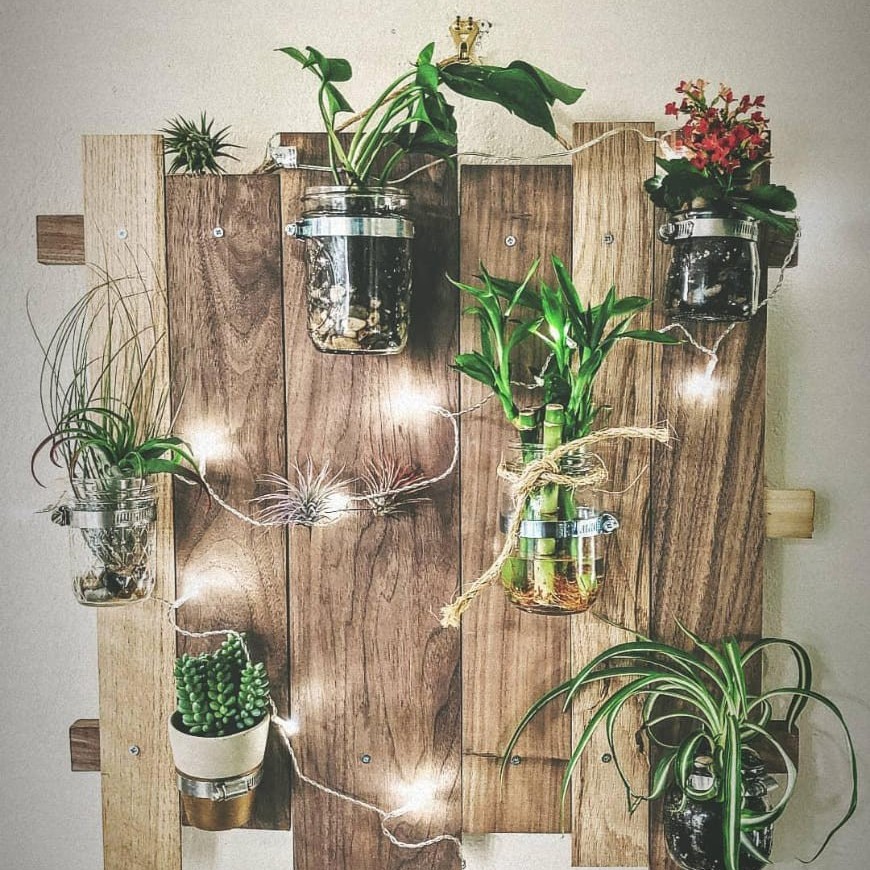
Final product
And voila! I was really proud of this project since it was our first DIY and we received a lot of compliments from people who visited us. Here is the story Bhaskar put up on Instagram, it was indeed, a Sunday well spent 🙂

Budget
We estimated this project to be around $50 but it worked out closer to $80. Most of the cost came from the walnut boards (~$40) and the plants we bought (~$30).
To reduce the cost, you can choose cheaper hardwoods like poplar for all the boards.
Gotchas
We were noobs when we did this project but have come a long way since.
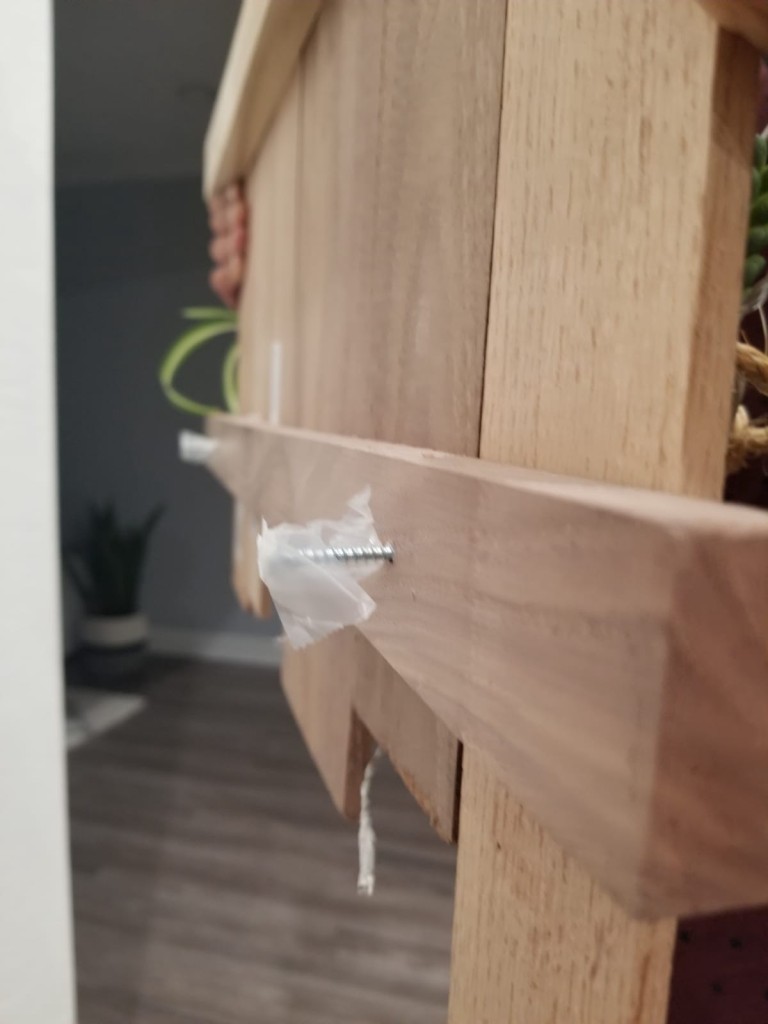
We naively did not account for the extra depth that the eye hooks created on top, so the first time we hung it up, it tilted forward. As a quick fix, we hacked our way and attached a couple of nails at the bottom to match the depth of the hooks. Yes, we were amateurs when we did this, but we do plan to replace it with a scrap board sometime soon. We all learn a little something everyday!
Tips and Tricks
- While we used boards of similar widths for a cleaner sharper look, you could always try more uneven ones with rugged corners for a more rustic look.
- We did vertical boards in front with horizontal bracing for a longer visual effect. You could do the reverse as well.
- The jars are screwed into the back braces so make sure to account for sufficient bracing if you want your plants nicely spread out. We started off with two braces on the back and quickly realized that it wasn’t sufficient to space out the plants, so we added brace in the middle.
- For a fuller look, I kept the taller plants at the bottom with nothing above and the creepers on the top to allow them to grow down and around the board.
Full disclosure: I am a terrible plant mom, I have killed over 5 different outdoor potted plants and almost as many indoor plants. When we picked out plants for this project, I especially loved the cactus on the bottom left. It was the perfect size and came with the planter. I diligently watered it along with all the other plants on the board for almost a month, swearing to keep them alive. Until one day, Bhaskar pointed out that the cactus was planted in thermocol. Yes, I was watering a plastic plant for a month and yes, I am still embarrassed to this day. But who is to say what, it has been about a year and the hanger has held up extremely well, so overall, I am quite satisfied with this project 🙂
Aannndddd that’s a wrap.
Loving Life Today
I have been listening to the song “Walk With Me” by Taba Chake on loop all day. If you enjoy Indie folk, do check it out.
